
In this post you will learn how to create a bootable Windows usb while on a Linux machine.
First you will need the Windows iso file, you can download it on Microsoft's website.
Now you will need to extract the iso file's contents to an empty folder. An easy way to do it is using the 7zip program, if you don't already have it installed, you can install it using your package manager, should be easy.
To extract the iso using 7zip you will first need to move the iso to an empty directory, open a terminal window inside the directory and run the following command
7z x "iso_file"
It will begin extracting all the files, shouldn't take long. After the command finishes executing, there will be a lot of new files in the folder, remove or delete the original Windows iso from it.
Next an usb drive will be needed, recent Windows isos are big enough that you might need a drive with 8gb or more of space. The next step will format the drive, meaning all files inside it will be lost! Backup the files in the drive if necessary.
The drive will have to be formated with a gpt partition table and one fat32 partition. If you already know how to format your usb drive, you can skip the next step.
There are many ways to format an usb drive on Linux, one of the easiest is using gparted. It's a gui frontend that uses libparted to manipulate device drivers in general, if you don't have it installed already, get it using your package manager. With gparted installed and the usb drive plugged in, we will need to run gparted as root, to do this, open a terminal and run:
sudo gparted
A screen like this should appear:
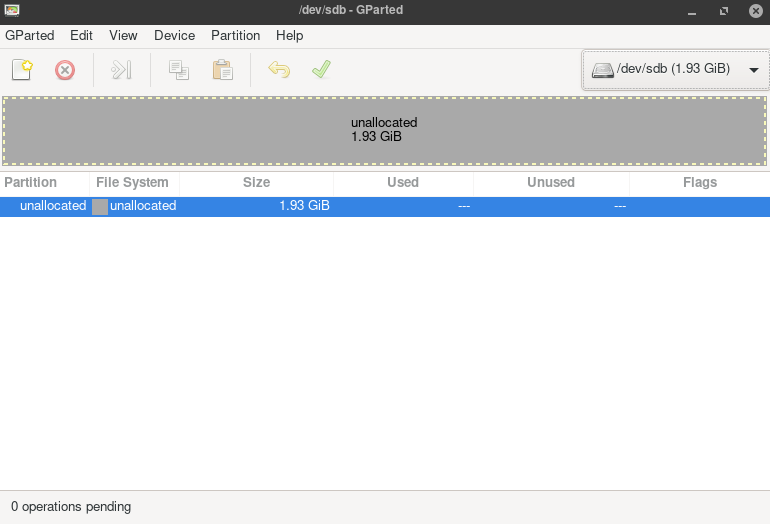
Now make sure you select the correct device, it should be the one with the size of the drive. Assuming you don't have any other drivers plugged in the computer, your hdd/ssd should be located in /dev/sda and the usb you inserted in /dev/sdb. After selecting the usb drive we need to create a gpt partition table, to do this go in Device->Create Partition Table... a menu should open up, there in Select partition table type, select gpt then click Apply.
First step is done, now we need to create one fat32 partition, to do this go in Partition->New, another menu should open up with several options, in the File system option, select fat32, don't change anything else and click Add. The usb drive is almost ready, now you just click the green check mark in the main gparted menu and all changes to the driver should be saved.
With our usb ready, all we have to do now is mount the usb drive and move the files we extracted earlier, from the Windows iso, there. If for some reason you're have trouble mounting the drive, follow the following steps: First you need an empty directory, next you will need to run the following command as root
mount "device" "empty_directory"Device should be /dev/sdb1 assuming you only have your hdd/ssd and the usb drive plugged in, make sure you choose the correct one, to list all devices currently plugged you can run the following command as root:
fdisk -lempty_directory should be the full path to the directory you just created. Now just move the files you extracted from the iso inside that folder, after it finishes moving, run the command:
umount "device"again as root and wait for the command to finish executing, it can take a while.
Assuming all went well, you should have a functioning bootable Windows usb that can be used to install Windows on any computer you choose to do so, good luck.